Replacing the Grill
Over time, the front grill of the FTO gets rusty and tends to look rather shabby. This guide demonstrates how to remove the front bar and replace the grill. Additionally, it shows how to fit a second grill over the ducts below the main grill.
Removing the Front Bumper Bar
To undertake the steps below, you will need:
- A 10mm and 12mm socket.
- A phillips head screwdriver
- A small flat head screwdriver
Step 1. Open the bonnet
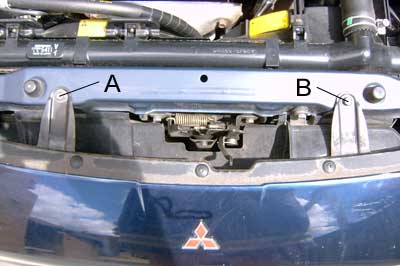
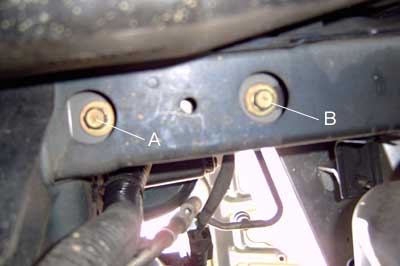
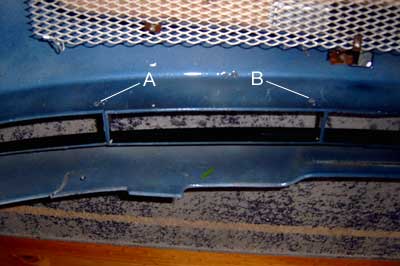
Step 2. Remove the 2 bolts marked A and B in the picture below:
Next we need to detach each side of the bumper from the associated guard. We'll start with the passengers side (left).
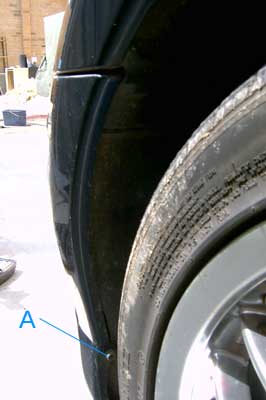
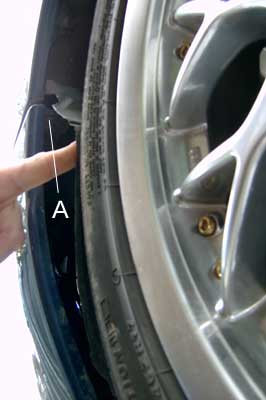
Step 3. Remove the bottom bolt on the inner guard in the left wheel arch (illustrated as A below):
Step 4. Pull the inner guard out towards the wheel so that you can get in behind it. This is required because there is a bolt holding the bumper to the guard.
Step 5. Remove the bolt holding the bumper to the guard. The bolt is illustra3ted below:
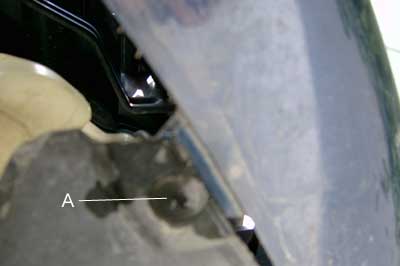
Step 6. Remove the 2 underbody plastic screws that are attached to the underside of the bumper (One of these is illustrated below):
That frees up the passengers side.
Step 7. Carry out the same steps on the drivers side of the car.
Step 8. The bumper is attached to the subframe with 4 12mm bolts, 2 on each side. Poke your head under the car and remove these. You will probably need one or 2 extensions on your socket to get at them. The bolts in question are illustrated below:
The bumper should now slide out about 20-30 cm.
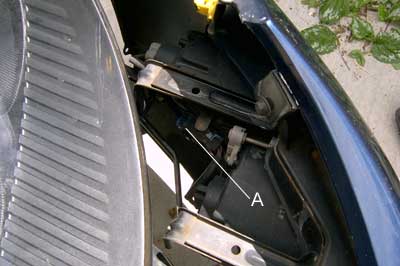
Step 9. Unclip the connectors for the indicators/park lights. These are illustrated below:
The bumper is now totally detached from the car and should now be able to be removed.
Replacing the Grill
To undertake the steps below, you will need:
- The mesh of your choice.
- Wire cutters
- Drill
- Four small screws with nuts
Mesh comes in a range of colours and sizes. Just make sure that you dont make it too fine or it will impede the airflow into the radiator. Other than that its down to personal preference. I got my mesh from Autobarn for $30.
Step 1. Remove the old grill from the back of the bumper. There are 4 screws and a number of clips holding it on. Be careful not to break the plastic stalks that the clips are pushed onto.
Step 2. Cut the new grill to fit.
Step 3. Replace the clips and screws you removed earlier.
Now we are ready to apply a second grill. These steps are optional and will only apply to certain model bumpers. My FTO is a 95 GPX, but I have noticed that there are at least 2 variations of this bumper.
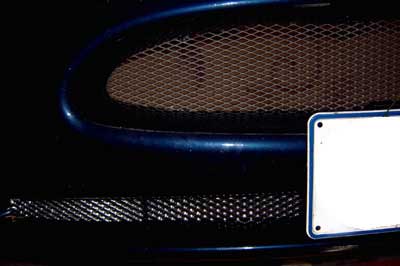
Step 4. Cut a strip 1.2m by about 7cm and mould it over the hole as shown below:
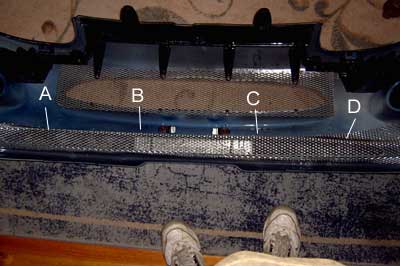
This picture also shows the back of the grill. I have already moulded the mesh to the hole. Now the trick is to attach this so that you cant see the screws. The ol=nly way we can really do this is if we attach the mesh at the top only. This is described below.
Step 5. Drill four evenly spaced holes in the top of the duct. I have shown approximately where these should be in the picture above. When you are doing this it is probably best to leave the mesh on so that you can drill through a hole in the mesh. (Holes shown below).
Step 6. Push a screw through each hole from underneath and stick ona nut and tighten. The nuts should be on the inside of the bumper.
And thats it. Word of advice. Dont start this with a thunderstorm looming like I did, otherwise you will be lying in a puddle of water when you put everything back together.
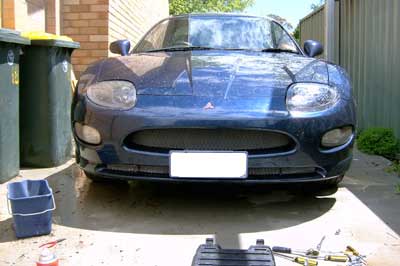
Now put the bumper back on using the reverse of the above process. Leave off tightening the subframe bolts until last this allows for adjusting the bumper for best fit. Several pictures of the finished article are shown below: